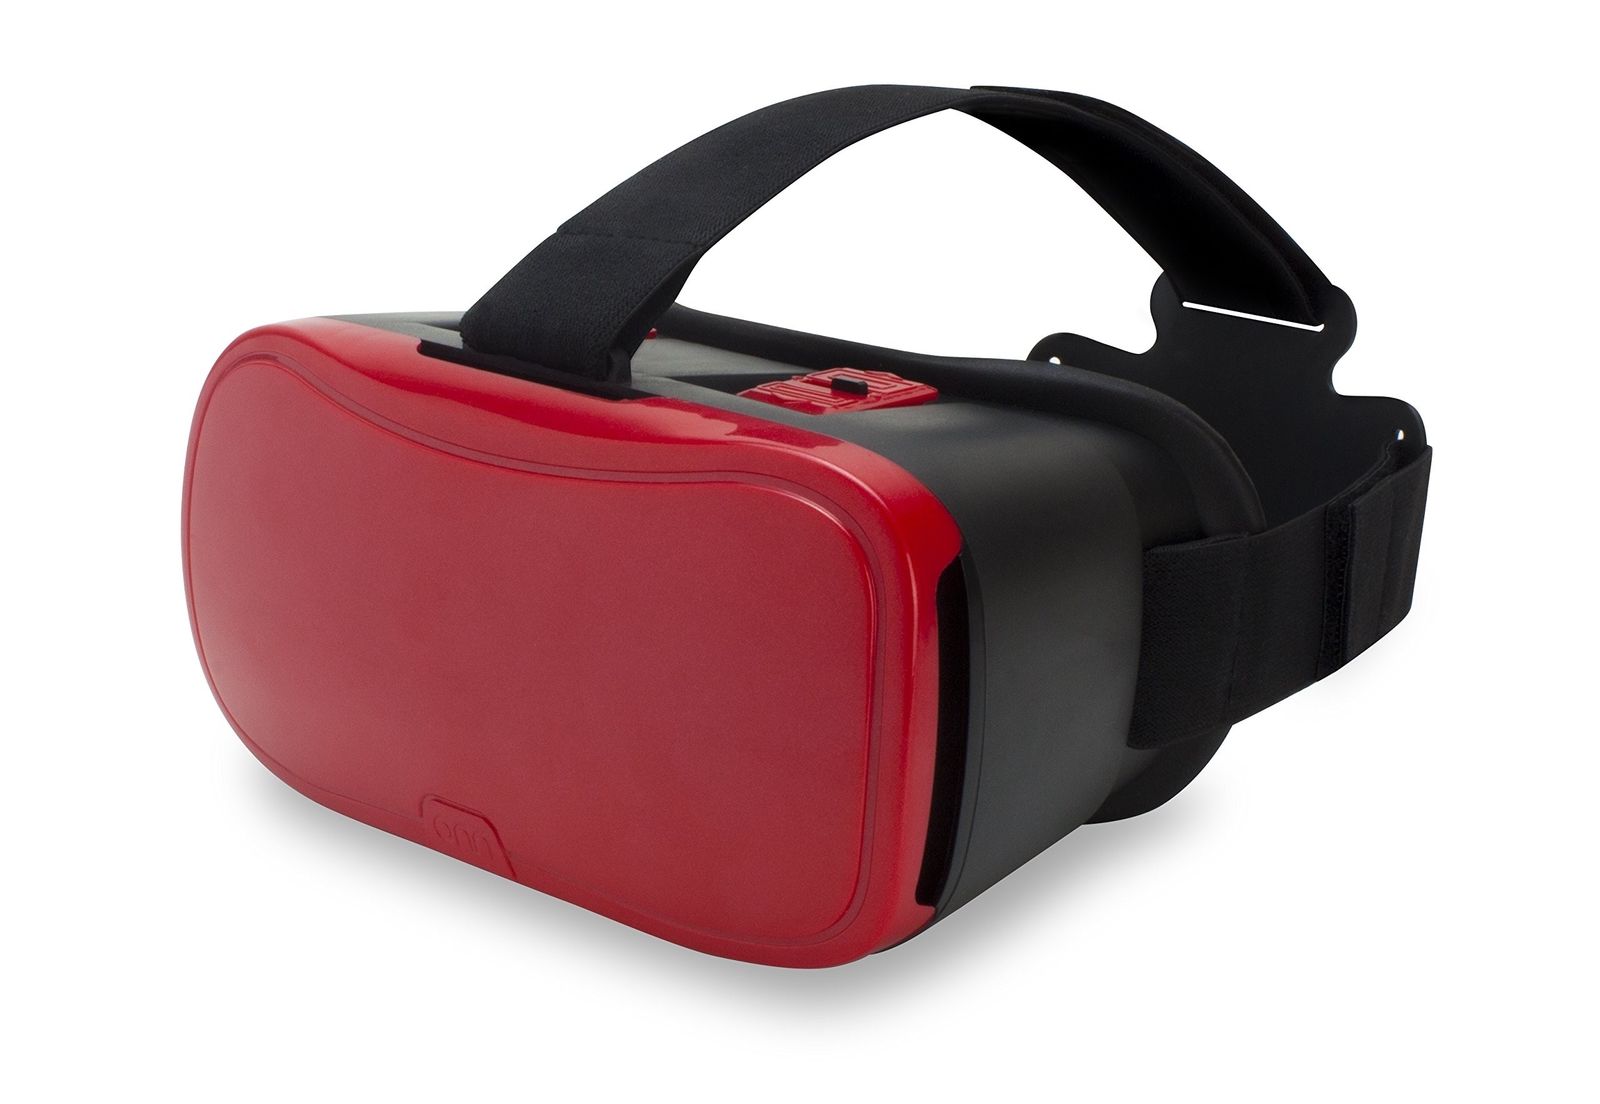
In a side project, I have made a Virtual Boy emulator run on iOS using using the Google Cardboard to allow the end user to use an inexpensive VR viewer to play the games with the 3D effect they were designed for.
Source code can be found here
Virtual Boy emulator for iOS using Google Cardboard
https://github.com/tomkidd/VirtualBoyVR-iOS
Effectively, I took an existing emulator for iOS called Provenance that used code from the Mednafen emulator, which includes a Virtual Boy component, and got a pared down version working with Google’s Cardboard SDK
So, I had this idea at some point during the Quake 1 iOS port. As I mentioned, at some point just to experience the VR port I found correctly, I bought an inexpensive VR viewer. I had previously bought a literal cardboard viewer from Best Buy which was great and worked but it didn’t have any way to strap itself to your head, and the Quake 1 VR port required use of a game controller. This newer one I got from Walmart was a more elaborate headset and it also had a head strap, which the other one sorely lacked. It was also insanely cheap – the cardboard one from Best Buy was $9.99 originally, this one from Walmart was $5.00. Like, not $4.99, $5 even.
And I’m not kidding when I say I went to the store and there were a few colors to choose from and I noticed one of them was red. And not just any red, the exact same red as the Virtual Boy. I may be reading too much into it, but this can’t be a coincidence. Someone somewhere involved in this thing knew what they were doing.
3-D game for a 3-D World.
In any event, I made a connection in my head – I wonder if you could use one of these to play Virtual Boy games? You’d have to have some sort of emulator that could handle Cardboard, Google’s platform for cheap VR, and it would need to be able to render it just right for the two lenses.
I searched online to see if anyone had done this yet. I found that one of the first things someone did when Oculus started sending out their development units was to port VBjin, a Virtual Boy emulator, over to where it could run on the headset. I saw at least one report of someone being able to mirror that emulator to their Android phone so they could use it in Cardboard VR. I saw another post of someone who was able to tweak the RetroArch emulator on Android to achieve a similar effect, and some theoretical but unproven postulations that a similar procedure might work on iOS.
But in any event I couldn’t find any evidence of a working iOS Virtual Boy emulator using Cardboard or any other VR technology, so I thought maybe I could figure one out.
So, like in my id Tech ports, what I’m good at is taking existing tech and stringing it together. I wasn’t about to write a Virtual Boy emulator, that was a solved problem. But I had some experience with Google Cardboard’s SDK on iOS, if for no other reason than I stripped it out of that Quake port. I thought – how hard could it be to put it into an existing project? So I started looking into it and, before too long, I had it working.
Emulation of game consoles pretty much became a thing in the late 90’s with the release of Nesticle. Yeah, that’s seriously the name. It was the first truly feasible Nintendo Entertainment System emulator to be released. NES emulation wasn’t exactly a new thing, but prior to Nesticle it had been limited to primitive exercises, whether by lack of knowledge or lack of skill. An emulator called Pasofami was one of the earliest emulators but it didn’t have much speed or accuracy, and the ROM images for it spread across several files, likely to mirror the data structures of the ROM chips on the cartridges. An emulator called iNes wasn’t a ton better but it did introduce the single-file .nes ROM format which would be the gold standard going forward, to be duplicated by emulators for other systems. And then Nesticle came out in 1997 and overnight everything changed – it could run tons of NES games, including the most important ones like the Super Mario Bros. trilogy, The Legend of Zelda, Metroid and Castlevania. Suddenly NES emulation wasn’t an academic exercise, now you could actually feasibly play old games. Now people who weren’t interested in the tech behind it were picking up on the hobby. Multiple web sites about the hobby came online and followed all the developments. People who didn’t want ROM images just to study their contents but rather because they wanted to play the games. And before anyone thinks I’m deriding the newcomers, it’s worth mentioning that this is when I picked up on the concept too.
With today’s digital gaming ubiquity it’s hard to remember that, at one point in time, when a game was gone it was gone. The NES officially left the market in 1995, but it had pretty much withered away years prior, which was just a matter of time since the Super NES was released in 1991. But if you wanted to play the original The Legend of Zelda, you had to hunt it down. There were no digital releases (heck, MP3 was still a few years off), there were no more copies being made, and so if you couldn’t find a copy then you were out of luck. If your old copy stopped working or you lost it or your NES stopped working or you lost it or sold it in an ill advised baseball card transaction, there weren’t a whole lot of options. And remember this is before eBay, Craigslist, etc. or at least before any of those became viable or ubiquitous options.
All of this is to say that the early infatuation with collecting all the ROM images of all the games you ever wanted wasn’t so much about rampant video game piracy as it was that a number of people whose parents sold their NES when they went off to college were suddenly delighted that it turns out those old games aren’t dead and gone after all. When Nesticle was released, only a small subset of the NES and Famicom (the NES’ name in Japan) games had been dumped, after that there was a gold rush to dump pretty much every game ever made.
Emulators for just about any system you can think of followed, the SNES, the Sega Master System, the Sega Genesis, the Atari 2600, everything. Emulation as a hobby exploded. This raised lots of issues, like whether or not it was ethical or legal to host ROM images since they were copyrighted material, but the games they were based on were long gone from the market (the answer is: it is illegal, since something doesn’t have to be distributed in order for copyright to protect it, but I’m not a lawyer so don’t take my word for it). Another issue was where emulation crossed the line from game preservation to piracy facilitation, such as when the UltraHLE emulator that allowed Nintendo 64 games to run on the PC in the peak of that console’s life.
But at some point emulators for every old system you could think of existed, down to the really obscure systems like the Sega SG-1000. All that was left to do was to emulate newer consoles, and while some people worked on that doggedly, for the most part a lot of the mania died down once all the old systems were emulated and all the old games were dumped.
And parallel to all of this, Nintendo released the Virtual Boy.
I’ve heard different explanations for how the Virtual Boy came to be, how it came to market, and where Nintendo saw it in their lineup. It’s known that it was the brainchild of Gunpei Yokoi, who had been working at Nintendo for decades, predating even their entry into the video game market. He invented toys for them like the Ultra Hand, and when Nintendo entered video games he produced iconic titles like Kid Icarus and Metroid. His largest achievement was designing the Game Boy. So in some ways it was natural for him to try and do a different kind of portable console, and to use the “Boy” moniker.
Virtual Boy uses tech that’s hard to explain but the gist is that it used an oscillating mirror to allow a single row of red LEDs to create a pair of images. When I first heard of it I always figured it was two small LCD displays or something and you just focused in on them (basically what a Cardboard VR headset did) but instead it was basically a cross between a light trick and an optical illusion. In hindsight it makes sense since they had to get this down to an affordable price and the thing I pictured it would be was probably too expensive for 1995.
Nintendo is known to have an research lab that works on many things that never go on to see the light of day. Multiple sources on this indicate that the Virtual Boy was not in a state where it was ready to be brought to market but Nintendo wanted to release something to offset the competition. The Nintendo 64 was taking longer than expected and was looking more like a 1996 product, meanwhile arch rival Sega and newcomer Sony were both releasing consoles in 1995. Nintendo wanted to release something in 1995 so they stepped up the timetable for the Virtual Boy. It originally went under the code name VR-32 which would cover both the bases of virtual reality (which was seen as the future of gaming in 1995 – this recent push with Oculus and the like isn’t the first rodeo for consumer VR) and being a 32-bit console, which both the Sega and Sony consoles were.
And this sounds like it was a stupid reason to rush something to market, and maybe it was, but it’s worth noting that it’s the exact same thing they did close to a decade later with the Nintendo DS and that console went on to be their biggest selling console to date. They felt threatened by Sony’s impending PSP entry into the handheld console market and they rushed an experimental dual screen with touch system to market. And it worked.
But the Virtual Boy, however, was a dud in the market. The public didn’t go for it. It required being set up on a table to be used, which made it both not a particularly portable portable console as well as not being a regular TV-based console. People found the choice of red LEDs baffling (cost issues not being a concern for the end consumer). Nintendo mandated an optional auto-pause feature on every game to try and offset any headaches the machine might cause, which most took to be a bad sign (though Nintendo has implemented a “hey maybe go outside or something” feature in a number of systems since then). And Nintendo warned that children under the age of seven should not use the device due to the threat of eye retardation. That was a big red flag (no pun intended) to a number of consumers (although a similar warning accompanied the 3DS, however the 3D effect could be turned off and the 2DS was also introduced for younger audiences). And although naming the thing “Virtual Boy” invoked the concept of virtual reality, a fixed viewfinder with no motion sensing and a single color screen was not what most people had in mind. I’ve heard mixed reports over the years as to whether or not the intention was ever to produce a full blown VR headset (to the extent that this was even possible in 1995 at an affordable price point) and the plans just got scaled back, and the intent to which the Virtual Boy started out similar to what wound up shipping and the “Virtual” nomenclature was pure marketing department nonsense.
Plus the single biggest issue was: a number of people who were wanting to buy a next generation console were not going to buy a Virtual Boy. They were told the Nintendo 64 was being delayed until 1996 and in the meantime Sega and Sony had 32-bit disc-based consoles for their televisions available immediately. This bizarre toy thing was not a substitute.
Sales were lackluster after the summer 1995 launch, exacerbated by a high number of returned consoles, and by spring 1996 the console was discontinued. Next Generation magazine, when sizing up Nintendo in an article right before the Nintendo 64 launch, called the Virtual Boy “Nintendo’s Vietnam”.
A few years after this is where I entered the picture. As in, when all of this was going down with the Virtual Boy and the game systems and so forth, I was starting college and for various reasons I completely ignored the entire thing. I kinda sorta heard a few things about the Virtual Boy but I pretty much ignored it. Around 1998 I read up some more on it and came to the conclusion that the Virtual Boy hit all my “dumb shit” buttons. A company that ruled the universe with the NES, basically invented the handheld game market with the Game Boy (the handheld market with removable cartridges anyway), and goes on to win the SNES vs. Genesis race, albeit by a much smaller margin, would go on to struggle with their main console against a company that made VCRs and the Walkman, and along the way released an entire console, complete with a line of games, that went over so poorly it was discontinued within a year? I had to get one of these things.
It happened to be at the very tail end of the era when you could still find a few Virtual Boy units bouncing around in stores. I found one at a Toys ‘R Us, the last one I think, for $30 in a beat up box. When I got it open I discovered it had no visor (the black rubber thing that blocks off the light on the sides of your head) so that was a bummer, especially since I couldn’t return it for a different one because it was the last one. It did have an extra game, I think it may have been Virtual Boy Wario Land, in addition to the pack-in Mario’s Tennis, so that was nice. The cartridges had saved games on them already, so clearly this unit had been returned.
And this was around the same time as that aforementioned boom in emulation, in the immediate wake of Nesticle.
So, you remember how I said there were multiple websites that sprang up about emulation? Well, I ran one of them back in the day. Two, actually.
My mother worked for a volunteer organization that wanted to put up a web site, which in 1998 was still a new enough concept that it wasn’t a given that any given organization would have a website, and naturally non-profit organizations were amongst the last to deem it completely necessary. But since her kid was into computers she asked if I’d do it, so I did. Looking back at the website in question, only available via the Internet Wayback Machine both because the site is long defunct and maybe because the organization is defunct (or perhaps just changed its name) I proudly point out how it was created in FrontPage and needed Internet Explorer.
So when I decided to make my own emulation websites, I just did so in a subdirectory of this main site. I don’t think I ever told my mom I was doing this, and probably not because I thought she’d disapprove or say no, but rather because it probably never even remotely occurred to me that anyone would ever have a problem with this.
The first website I made was all about NES emulation. Websites like Zophar’s Domain (which, holy shit, is still around in some zombie state) covered everything. I didn’t want to cover everything, I wanted to cover NES emulation, both because I figured a single-console focus would have its benefits and also because the NES was my favorite old console, mostly because I owned one back when I was a kid. Both because the NES was a gray console and also because I thought it would be an hilarious pun on the fact that console emulation’s legality was a bit of an unknown amongst a lot of people, I called the site The Gray Area. The Wayback machine doesn’t have the header graphic for whatever reason but I used an image from the actually quite awesome looking NES patent. And I think the basic layout of the site and CSS (wait did CSS exist yet?) was inspired by Blue’s News which, I have to say, still kinda looks like that today.
So then I got thinking – what about the Virtual Boy? Here was another dead Nintendo system, were there any emulators for it?
I don’t remember if I started looking for an emulator before one existed or if one existed yet but in any event, one of the first, if not the very first Virtual Boy emulators, was called VBEmu98 written by a guy named David Tucker. This name sort of fit the pattern at the time – there was an SNES emulator named Snes96 and another one, from someone else, called Snes97. One day their authors decided to combine their efforts and the result was Snes9x, which still sees updates to this day.
So figuring that there was value to be had in making one of the first if not the first emulation news site about the Virtual Boy, I made a basic clone of The Gray Area and called it, naturally, The Red Area. Like The Gray Area, the header image has been lost to time, as has the red background (I guess I used a tiled graphic instead of a background color for some reason) but I used the even more awesome photo from this Virtual Boy patent that even goes so far as to model a girl playing the game in its drawing.
So in any event, VBEmu98 saw some updates and I would email back and forth with the author some. The Virtual Boy emulation community was pretty nascent at the time. At some point every Virtual Boy game had been dumped into a ROM image and apparently I was hosting/mirroring them on my website. Why on earth I thought this was a good or cool idea I don’t know but maybe I can chalk it up to being young and stupid.
The last snapshot on the Wayback Machine of The Red Area covers the timeframe from November 25, 1998 to February 8, 1999, which can’t be the entire run of the site. I know this because, amazingly, the website for VBEmu98 still exists. At some point I asked what VBEmu98 was going to be called once 1999 rolled around and the result was The Red Area hosting a contest to rename the emulator. I guess I had discovered how to make a form with FrontPage that could update its contents because the actual contest page is pretty bonkers. It looks like at some point a stretch of “names” being submitted is actually a smack talking face-off between two people in a dorm or something.
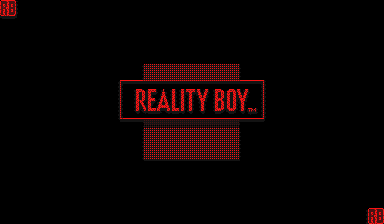
In any event, I don’t remember the exact process after this but the result was that the chosen name for the emulator was: Reality Boy. Which I have to say is pretty perfect to complement the name Virtual Boy.
I don’t know how to live but I’ve got a lot of toys
The exact history of what all went down with The Red Area is fuzzy because it was so long ago and snapshots past that one from February 1999 don’t exist but I can piece together some of it from the VBEmu98/Reality Boy “Old Newz” page. It looks like I stopped hosting ROM images in March 1999 because that’s when he was willing to link to my site. April 1999 was when the contest ended, and in January 2000 he mentioned in a post wondering what happened to The Red Area so I guess the site was gone by then. By extension, The Gray Area was probably gone too. Looking back at the root page of that site in the Wayback machine indicates that the domain was no longer being used by that non profit organization, so probably at the very least my mom no longer worked for them and the domain lapsed. It’s entirely possible she stopped working for them long before 2000 but I kept updating the sites because I still had FTP access until the organization stopped paying for hosting. Looks like in the years since it was used as a genealogy site as well as someone’s personal blog, a placeholder page from an ISP that kicked off the genealogy/blog site, a random site in Chinese that may have been a domain squatter, and then some sites that are definitely domain squatters.
The more recent news on the Reality Boy site (I don’t know why there’s two other than maybe the CMS he used changed – and it likely wasn’t called a CMS either) goes as far as 2008 when he released one last version of Reality Boy and its source (I believe it was always open source) and mentions trying to get it running on the Xbox and Wii.
So anyway that’s my history with the Virtual Boy and my involvement in the early Virtual Boy emulation scene. Hopefully handful of people who ever visited my old site back in the day got a kick out of that. I had actually kicked around over the years since then trying to make another, definitive Virtual Boy site but a website called Planet Virtual Boy has this nailed down pretty well so there’s not really a need to be filled.
In any event, according to PlanetVB, the final version of Reality Boy had something like an 86% compatibility rate. Something to remember is the Virtual Boy never had that many games. In so far as actual discrete games are concerned there were 22 games total. There were 19 games released in Japan and 14 games released in the USA, with some overlap in between. The ROM image equation becomes a little tricky since there’s both the concept of a game that was released in both countries (and it’s just the two, Europe never got the Virtual Boy) but with a different ROM image for each (so, one is in Japanese and the other is in English) and some games were released in both countries but shared the same ROM image (games that could get by with almost all English). Taking that into account there’s something in the ballpark of 30 ROM images for official games, total. So it’s trivial to calculate a compatibility rate due to the small number of games. With that in mind I took a look at the current state of emulators and saw that although there’s not many emulators for the Virtual Boy, it’s not too big of an issue since once you get the 22 games you’re at 100%.
Virtual Boy collecting is somewhat attractive for retro game and Nintendo enthusiasts since it’s not the most difficult thing on earth to get a complete collection due to the small number of games, although it has the same problem that pretty much every physical media console does where the last few games on the system can be expensive to acquire due to low print runs.
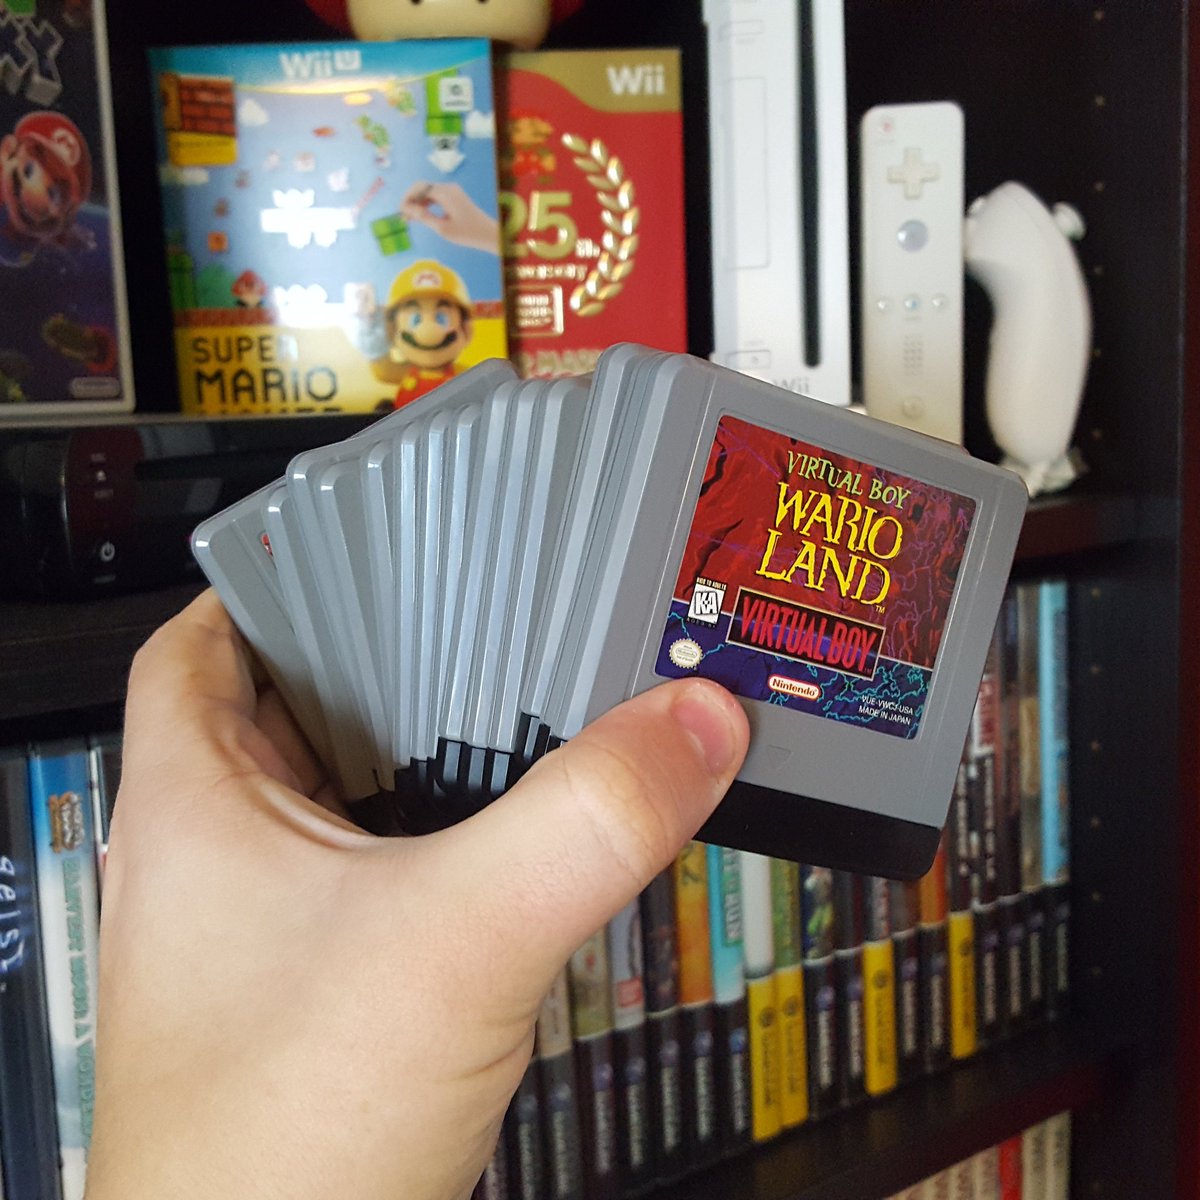
And the whole US collection can fit in one hand
In any event I started to explore what would be involved with getting a Virtual Boy emulator running on iOS using Google Cardboard VR. Like I said I wasn’t interested in writing one from scratch, and I knew that this was going to be one of those projects where I can’t spend a whole lot of time on it or else it’ll never get finished. I did start out a little too ambitious though.
Planet Virtual Boy doesn’t list iOS emulators, or even Android ones for that matter, though they do list emulators for Xbox (the original, I presume), the PSP and even the Wii, all of which would require hacking and jailbreaking. They do have a section for the Mac (bonus points for still calling it the Macintosh) and they list three emulators – one with 59% compatibility, one which has never seen a release, and one with 100% compatibility. Since getting something running on the Mac is at least part of the battle for getting something on iOS, I checked out the one with 100%: OpenEmu.
Up until a certain point in my life, basically once I started getting interested in iOS development, I was an all-Windows guy. The software landscape on the Mac is a bit different. There’s software out there that’s Windows-only, and this includes most games (these days, mostly just the big AAA titles like DOOM), and it’s prevalent enough that one of the major categories is virtualization software like Parallels so that the occasional Windows title you need isn’t impossible to get to. Then you have the software that has a Mac version as well as a Windows version. This is stuff like QuickBooks or Photoshop or Microsoft Office. The quality on this stuff can range from being in feature and cosmetic parity with Windows, to being rewritten or only matching its Windows counterpart in name-only, or it can be some hybrid of the two while adhering to the application and human interface guidelines of the Mac. Apple has an entire paradigm and design language for how Mac software should look and feel and act and sometimes developers adhere to this and sometimes they don’t. It used to be that Mac users would complain or reject software that didn’t adhere to these rules but this has waned over the years as the Mac has become popular outside of the long time Apple fans (ironically when Apple themselves would bring software to Windows, they’d go out of their way to make it look like Mac software, including whatever material paradigm they were using at the time – iTunes famously had the brushed metal appearance common in early versions of Mac OS X).
The point I’m trying to make here is that a Mac software application that looks and feels like a Mac software application is supposed to look like is rare (though in developers’ defense, it doesn’t help that Apple changes their mind every few years on what that’s supposed to be). But even more rare is this beast: the Mac-only app. Obviously it’s easy enough to make some sort of quickie utility for the Mac App Store, a large, well-designed Mac app that adheres to the guidelines and isn’t concerned with trying to be amenable to a Windows version is uncommon but greatly appreciated when it does happen. Examples include Sketch, MarsEdit and Ulysses. Another example on the open source front is the unofficial WWDC for macOS app which has the additional advantage that since it follows the developer conference for Apple platforms, it has every reason in the world to use as many Mac-specific guidelines, design cues and technologies as possible.
Well, OpenEmu is in this category – it’s Mac-only, it follows the design cues and guidelines, and it’s extremely unconcerned with being on Windows. It’s also open source, though that’s less surprising considering its multi-emulator nature. It not only has a Virtual Boy emulator but it also features a visual guide to configuring the controller as well as the ability to cycle through multiple different colors, including anaglyph 3-D options (the thing where you wear red/blue glasses to get the 3-D effect in comic books and 1950’s movies)
boots and pants and boots and pants and
It’s been a while since I really was deep into emulation but it appears there’s been a general migration away from using system-specific emulators and more towards “cores”, basically using emulators in a plugin-style arrangement. Not so much in the sense of, say, a literal DLL but more in the manner of making the code of other emulators be modular into a centralized front-end. So, OpenEmu isn’t so much an emulator as it is a well-designed front-end for various other emulators. But not front end in the “tell me what you want and I’ll pass command-line parameters to an executable” sense of the word, more just that it has several different emulators as cores. Another front-end that does this sort of thing is RetroArch, which is probably best known by its port for the Raspberry Pi named RetroPie (this is the thing your techie friend bursts a blood vessel over when you tell them you want to buy an NES Classic)
Case in point, remember how I pointed out that Snes9x emulator above? That’s the core OpenEmu uses for SNES emulation (well, one of them, there’s two options and Snes9x is the default). The team essentially took the source code for Snes9x and made it fit into their modular model.
The core that OpenEmu uses for Virtual Boy emulation is called Mednafen. It’s a multi-core emulator itself. The title is an acronym for My Emulator Doesn’t Need A Frickin’ Excellent Name. Yeah. Anyway it also uses “cores” but unlike OpenEmu or RetroArch it maintains all of them itself, though some were derived from other emulators. And one of those cores is a Virtual Boy emulator.
So, to recap, OpenEmu is a Mac-exclusive front-end to various emulators in the form of cores, one of those emulator cores is Mednafen, which itself maintains a number of emulators in the form of cores, and one of those cores is our Virtual Boy emulator. It’s the Kevin Bacon of emulation arrangements but it works.
I got OpenEmu building on my Mac but it was kind of a pain. The main thing is that its GitHub repo uses the concept of git submodules, which is a lesser-used feature of git. It allows them to have a repo for OpenEmu itself and then multiple other repos, each for the OpenEmu-ready ports of the other cores. This way there’s not one bigass list of changes and you have to sort through which changes affected which cores, you can just go to that repo’s cores. The part that made this a pain in the ass was that in order for git to allow you to do this, you have to have your SSH key set up. It’s a cryptographic hash that acts as a fingerprint for your computer and GitHub sets you up with one when you start pushing to an account from your machine. Well, I already had one set up but it still wouldn’t pull from the submodule repos because it said I didn’t have access to them, but I wasn’t trying to update them so I’m not sure what the holdup was. An the response from the developers was always: set up your SSH key.
Anyway long story short, I revoked my SSH key and re-did it and then it started working. I don’t know if mine was so old it was missing some sort of feature or if there’s an expiration or if GitHub is just kind of shitty in this department but in any event I got it up and running.
It was at this point, digging into the code, that I figured out what Mednafen was and how it related to being the way Virtual Boy games are played. And there was one more interesting thing – when I was checking out the files in the Virtual Boy core in Mednafen I noticed that one of the files is actually from Reality Boy. Apparently most of the Virtual Boy code in Mednafen is original to the project, but the actual code that emulates the v810 CPU is from Reality Boy since, I guess, no one’s ever topped that code. That or it was just going to be easier if you didn’t have to reverse-engineer an already reverse-engineered CPU. So that was pretty cool to see.
I can’t remember exactly what happened next but at some point the process of trying to figure out how to get portions of this OpenEmu thing working on iOS started to seem daunting, and then at some point I remembered Provenance and looked at it again. Provenance is a multi-emulator front-end like OpenEmu, but for iOS and tvOS. I had actually looked at it years ago when I was screwing around with early tvOS development. It did not have Virtual Boy emulation back then. Well, it does now – and for the same reason: it added Mednafen as a core. And in the Attributions section of the README file on GitHub, it mentions OpenEmu. Yeah – on some level the thing I was thinking of attempting – getting OpenEmu, or at least part of it, working on iOS – Provenance had already done that.
At this point I had a few options. I could create a new project and just graft over code from Provenance. Or I could fork Provenance and add the Google Cardboard VR bit as a new feature – they could even graft it in as a pull request if they wanted to. The problem with using a fork of Provenance is both that it has a bunch of stuff I wasn’t interested in or needed as a Virtual Boy emulator, but also because I would need to add a new dependency to it – the Google Cardboard VR SDK. And I’m not sure if anyone from Provenance would be interested in that. Besides the extra dependency, the Google Cardboard VR SDK only officially supports CocoaPods as a package management option, and Provenance uses Carthage, a competing package management solution. It may be possible to manually integrate the SDK but they weren’t giving instructions on how and I didn’t really want to figure it out myself.
I decided on the first option – create a new project and just graft over code from Provenance. Actually, my first idea was to re-write a lot of Provenance in Swift, since Provenance uses mostly Objective-C. I’m not real sure why that ever occurred to me as a good idea but in any event, as an idea it did not survive the first perusal of the source code because there’s a ton of it. So then I limited my scope to just re-writing portions of Provenance in Swift, namely view controllers. Besides just liking Swift better, I thought it would be easier to use the Cardboard SDK because my other example of using it – the Quake iOS VR port – used Swift for the view controllers so I figured it would more readily translate to Swift.
Yeah that idea didn’t last long either. Mainly because there are a ton of “make this value be this thing” types of code that don’t have the most obvious equivalent in Swift, especially when you’re dealing with also needing to interface with C/C++ code. Case in point, I had to pass an array of strings to Quake III in that project to launch it. Well, things like strings and arrays of strings are things that modern high level languages have but strictly speaking C/C++ didn’t have them out of the box. And long story short what I wound up having to do was then map them to an UnsafeMutablePointer<Int8> object/collection. Yeah, fun stuff.
I decided to stick with Objective-C. I started up a new project and then grafted in as little as I could. It took a few tries since my first approaches were flawed but at some point I had a decent subset of Provenance that could load up and launch Virtual Boy games.
By default, Mednafen‘s code will basically display one of the two eyes in red/black mode. I’m not sure which eye it is, but in any event it’s just the one and it’s a simple way to basically experience the game with no frills. Mednafen features the anaglyph modes like in the GIF above but by default Provenance has no way to cycle through or use any of them.
I drilled into the code that basically constructs the anaglyph options (and, near as I can tell, the non-3D red/black mode counts as an anaglyph mode despite basically ignoring the other eye). It’s straightforward – it basically goes pixel by pixel and, if you’re in a 3D mode, like the red/blue glasses mode, it checks the pixels. If it’s a pixel that exists on the left but not the right it draws it in red, if it’s on the right but not the left it draws it in blue, and if it’s in both then it draws it in purple.
My first assumption was that I would need to go in and modify this code to basically instead produce one wide image with the two eyes side by side, possibly with some space in the middle. As I looked at the code again I realized this wasn’t going to be quite so simple but then I spotted that there’s actually already a side-by-side mode built in, as VB3DMODE_SIDEBYSIDE in the mode enums. There’s also a “vb.sidebyside.separation” UI preference (hardcoded in Provenance, I believe) so that work was already done. With a little bit of work and some tweaking to how Provenance calculates screen size, I had the side-by-side mode rendering on the phone in no time.
So then I got to work on the Cardboard integration. When you launch a game you’re launching a view controller called PVEmulatorViewController. Simple enough. It then launches a view controller of its own, PVGLViewController which uses GLKit. I decided to create a second, parallel view controller, PVGCVRViewController and launch it instead. I put a bunch of code in place and once it built, I fired it up. I didn’t expect anything to run but to my surprise it displayed the side-by-side image, albeit in the wrong place.
Oh you almost had it, you got to be quicker than that!
In case you’ve never seen anything with Google Cardboard, part of what you’re getting out of the SDK is code to do the above – it takes whatever you’ve told it to render and it fisheye-lens warps it. When you combine this with the glass optical lenses of the viewer itself, it pretty much straightens itself out. It doesn’t really seem like it should work, but it does.
The Google Cardboard SDK both hands you the code needed to throw stuff on the screen (it essentially has a GLView and then this view on the top that constitutes the lenses and does the warping) as well as giving you the info needed to render each individual eye/lens. In the case of the Quake VR port, the author had done the work to render each individual frame twice, from slightly different angles, and then put it in the two eye views.
I, however, didn’t really need to do that – the emulator had already done the work to render both views, and it had them side-by-side, I mainly just needed to take the result I had above and just get the view to be centered on the screen. The emulator core basically hands us a video buffer (more or less a contiguous amount of pixel data) and some information about it like width and height so you know how to row/column the pixels. It then does some OpenGL stuff with it that I don’t completely understand but the gist is that it draws the pixels on an OpenGL texture, sort of like projecting a film on a screen. That’s the part that’s in the lower left hand corner of the above screenshot.
I figured what I basically needed to do was to figure out how to come up with a size that would center both screens within the eye halves of the screen as well a coordinate set that would get it in the center correctly. Once I figured out the right place to drop a glViewport() call, I figured it would be a simple math problem. And I knew what I needed to do next: break out the pen and paper and recall as much sixth grade algebra as possible.

Very clean and concise. Also, completely wrong.
First thing I had to overcome was the scaling – the resulting image from the emulator was a certain size, but we needed to hand it a separation size that was the distance from the center doubled, and then we had to make sure that number was commiserate with the actual pixel distance on the device (the phone screen) which is the dimensions of the pixel array times the scaling of the screen which is sometimes double again (like on the iPhone 7 or 8) and sometimes triple (like on the 7 Plus, 8 Plus, or X). So you have this virtual screen size (of a Virtual Boy, so that’s not confusing at all) and you need to hand it a separation value that makes sense in its native units, but doubled for each eye, and then have the whole thing be offset by an amount that itself either needs to be doubled or tripled depending on the screen. For a spare time project this can get hairy quick.
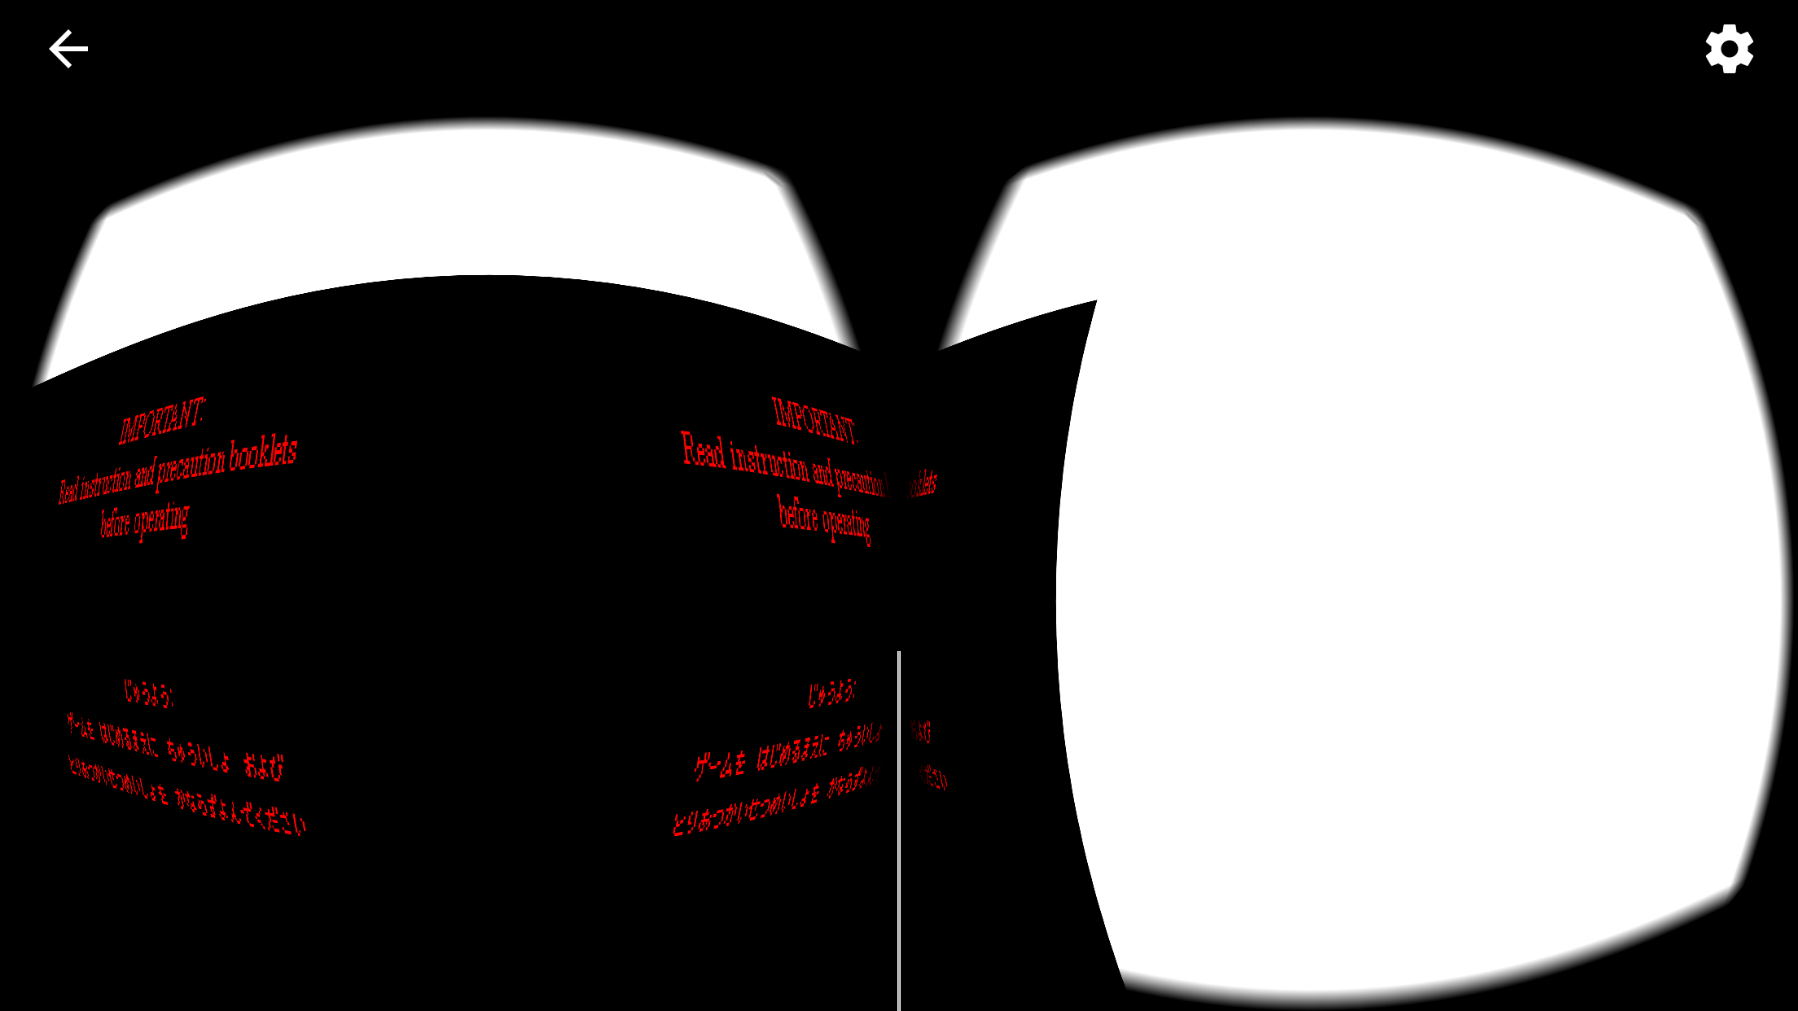
Part of the issue in testing this was that I couldn’t interact with the emulator on the simulator but using the real device was going to be so much slower, so I needed an opening screen that could tell me if I was making progress. However, part of the requirements Nintendo put forth for a Virtual Boy game was that every single game had to start with a warning screen about reading the instructions and the precautions in the manual. This goes back to that whole concern that for young children, the Virtual Boy might stunt eye growth. The problem for what I was trying to do was that it wasn’t completely clear where the split in the image was occurring between the left and right eyes because the warning text was always red text in the middle of a black screen with no discerning borders. The screen immediately after this was a “VIRTUAL BOY” logo in the middle of the screen with little “VB” icons in two of the corners, mirrored on each side, which acted as a quick calibration method on the actual hardware. But I couldn’t get to this screen.
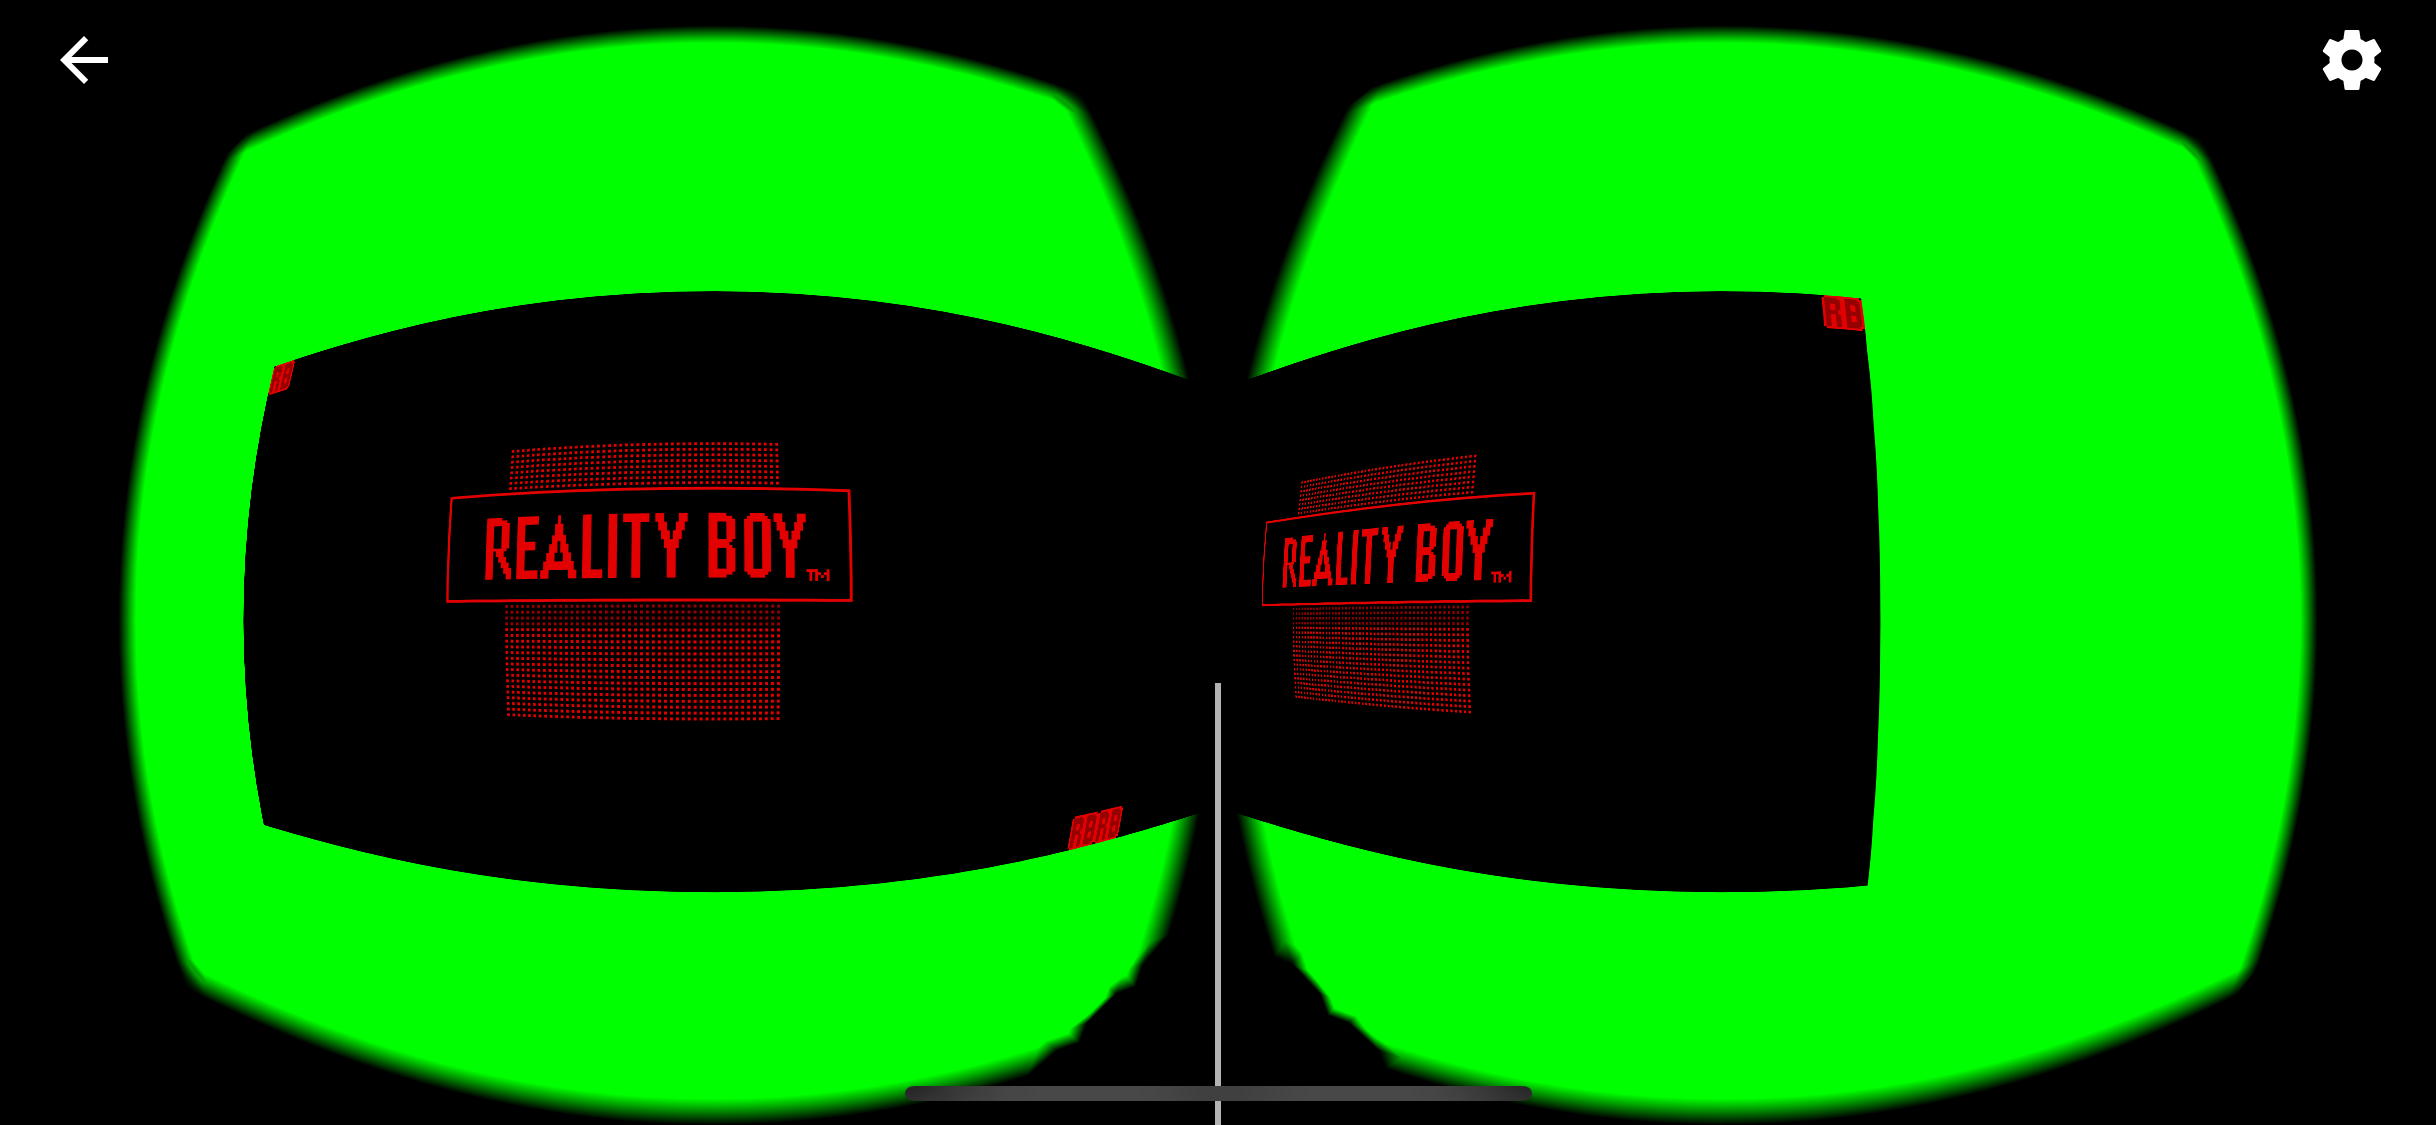
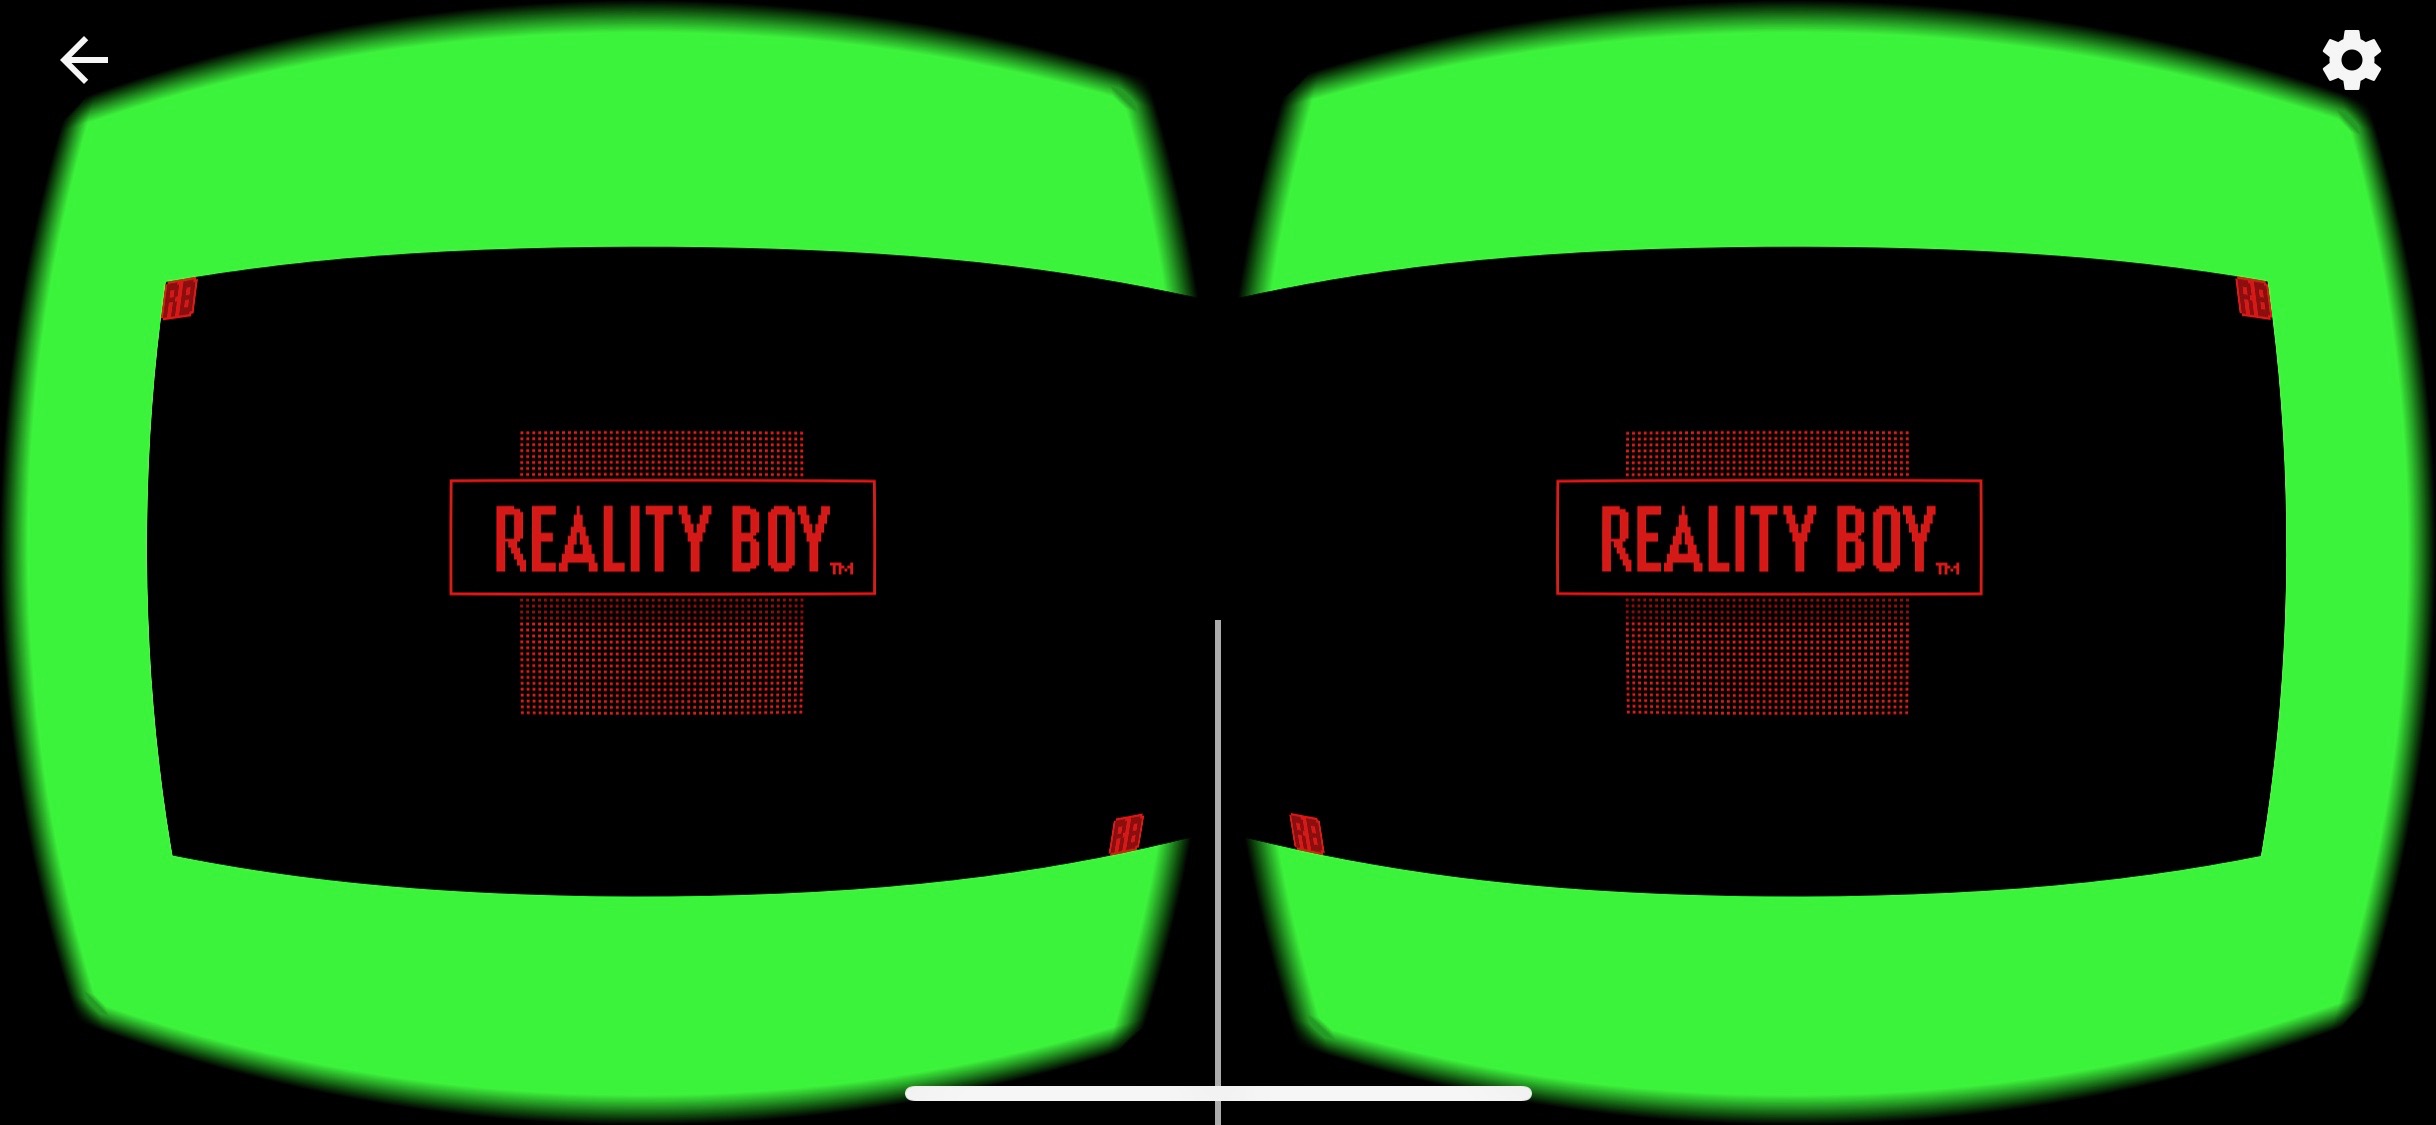
Fortunately someone (maybe David Tucker?) wrote a demo, in a screenshot I showed earlier in this article, that replaces the “VIRTUAL BOY” and “VB” icons with “REALITY BOY” and “RB” icons, and no warning screen. It wound up being exactly what I needed. (these screenshots, by the way, use green as a background both because I wanted to make sure I could change the background color and also because I needed to debug where the screen extremities were – the final emulator has a black background).
Gettling closer…
Anyway long story sort it took a while to hammer this out but I eventually came up with some calculations that put it where I wanted it, in the dead middle of the screen. And so I strapped on the helmet with the phone in it and… it didn’t work at all. Obviously I can’t just grab a screenshot of this but basically having the left and right images be in the center of the left and right eyes just wasn’t working – the left was too far to the left, the right was too far to the right, and my eyes couldn’t converge the two. I was already getting a headache from trying.
I was perplexed. I took out the center separation and just got the thing centered with no distance between the screens
If you say so…
I strapped on the helmet like this and… it worked. I fired up Virtual Boy Wario Land and played through the first level and it was amazing. I could see the 3D effect on the save file screens with the doors in the distance. I could see Wario’s arm appearing to be closer to the camera. I could see the blocks he had to smash protruding from the screen. It just straight up worked. For the first time in this whole exercise I thought this thing I was trying to do might work.
And I have to say that while it’s true that the majority of the Virtual Boy’s library wasn’t anything to write home about, there were a few notable exceptions. Namely, the aforementioned Virtual Boy Wario Land is an excellent game. Aspects of it would find their way into games like Mutant Mudds on the 3DS (which, naturally, has a hidden Virtual Boy-themed level in red and black). Red Alarm is a flawed wireframe shooter along the lines of Star Fox but if you can wrap your mind around which giant openings are giant openings and which giant openings are actually walls, it’s a pretty good game. Teleroboxer is sort of like a 3D Mike Tyson’s Punch Out! with robots. And even the Golf and Mario’s Tennis games are fun. And then there’s hidden gems like Jack Bros.
And in the case of some of these it’s crazy to think that they’re stuck on this system that very few people bought and fewer still operate today, and with the exception of people who did the Oculus port of the emulator or the hack thing with Android, very few people have experienced these games in their original 3D. A 2D emulator can’t do it justice and, in my opinion, neither can anaglyph glasses. It’s like how there’s a handful of really good games on the Wii U that haven’t had Switch ports (yet) and since the Wii U didn’t have that many sales, they’re stuck on this semi-obscure platform. Virtual Boy games are like that but to a much more extreme degree.
And going back to Virtual Boy Wario Land one last time, it’s a minor miracle that that game occurred at all. One of the issues that this recent VR renaissance has is that there’s a chicken-and-egg problem with regards to game scope. A lot of VR games feel like tech demos. And a lot of games that already exist don’t work well with VR. And until more top notch experiences exist for VR (and there are some – ironically most of Bethesda’s AAA titles like Fallout 4, DOOM and The Elder Scrolls V: Skyrim have VR versions) very few people will sink the investment into VR, and until more people do that there’s little incentive for developers to spend money on making deep VR games. And yet, here was Nintendo coming out with games that other than being in red and black, really looked and felt like Nintendo games. Sure, they didn’t have to worry with as much of the issues as VR games do today, like head tracking or real 3D engines (the Virtual Boy wasn’t really VR) but it’s like the developers broke out whatever Nintendo style guide existed in 1995 and used that as a guide to make these handful of games that very few people would go on to play. I’m reminded of the lead-up to the game Super Mario Run for iOS. At some point it became known that Nintendo was using the Unity engine for the game. Nintendo’s development process is usually pretty secretive but we knew they were using some off the shelf engine for that game. And yet if you hadn’t told me I’d never have known. It has the same animations, fonts, graphics, sounds and over-use of stars as every other Mario game. Similar claims could be said about their Fire Emblem game for iOS. It’s like it doesn’t matter what platform it’s on or what tech it uses, they break out the Nintendo style guide and make a game with it that’s unmistakably Nintendo.
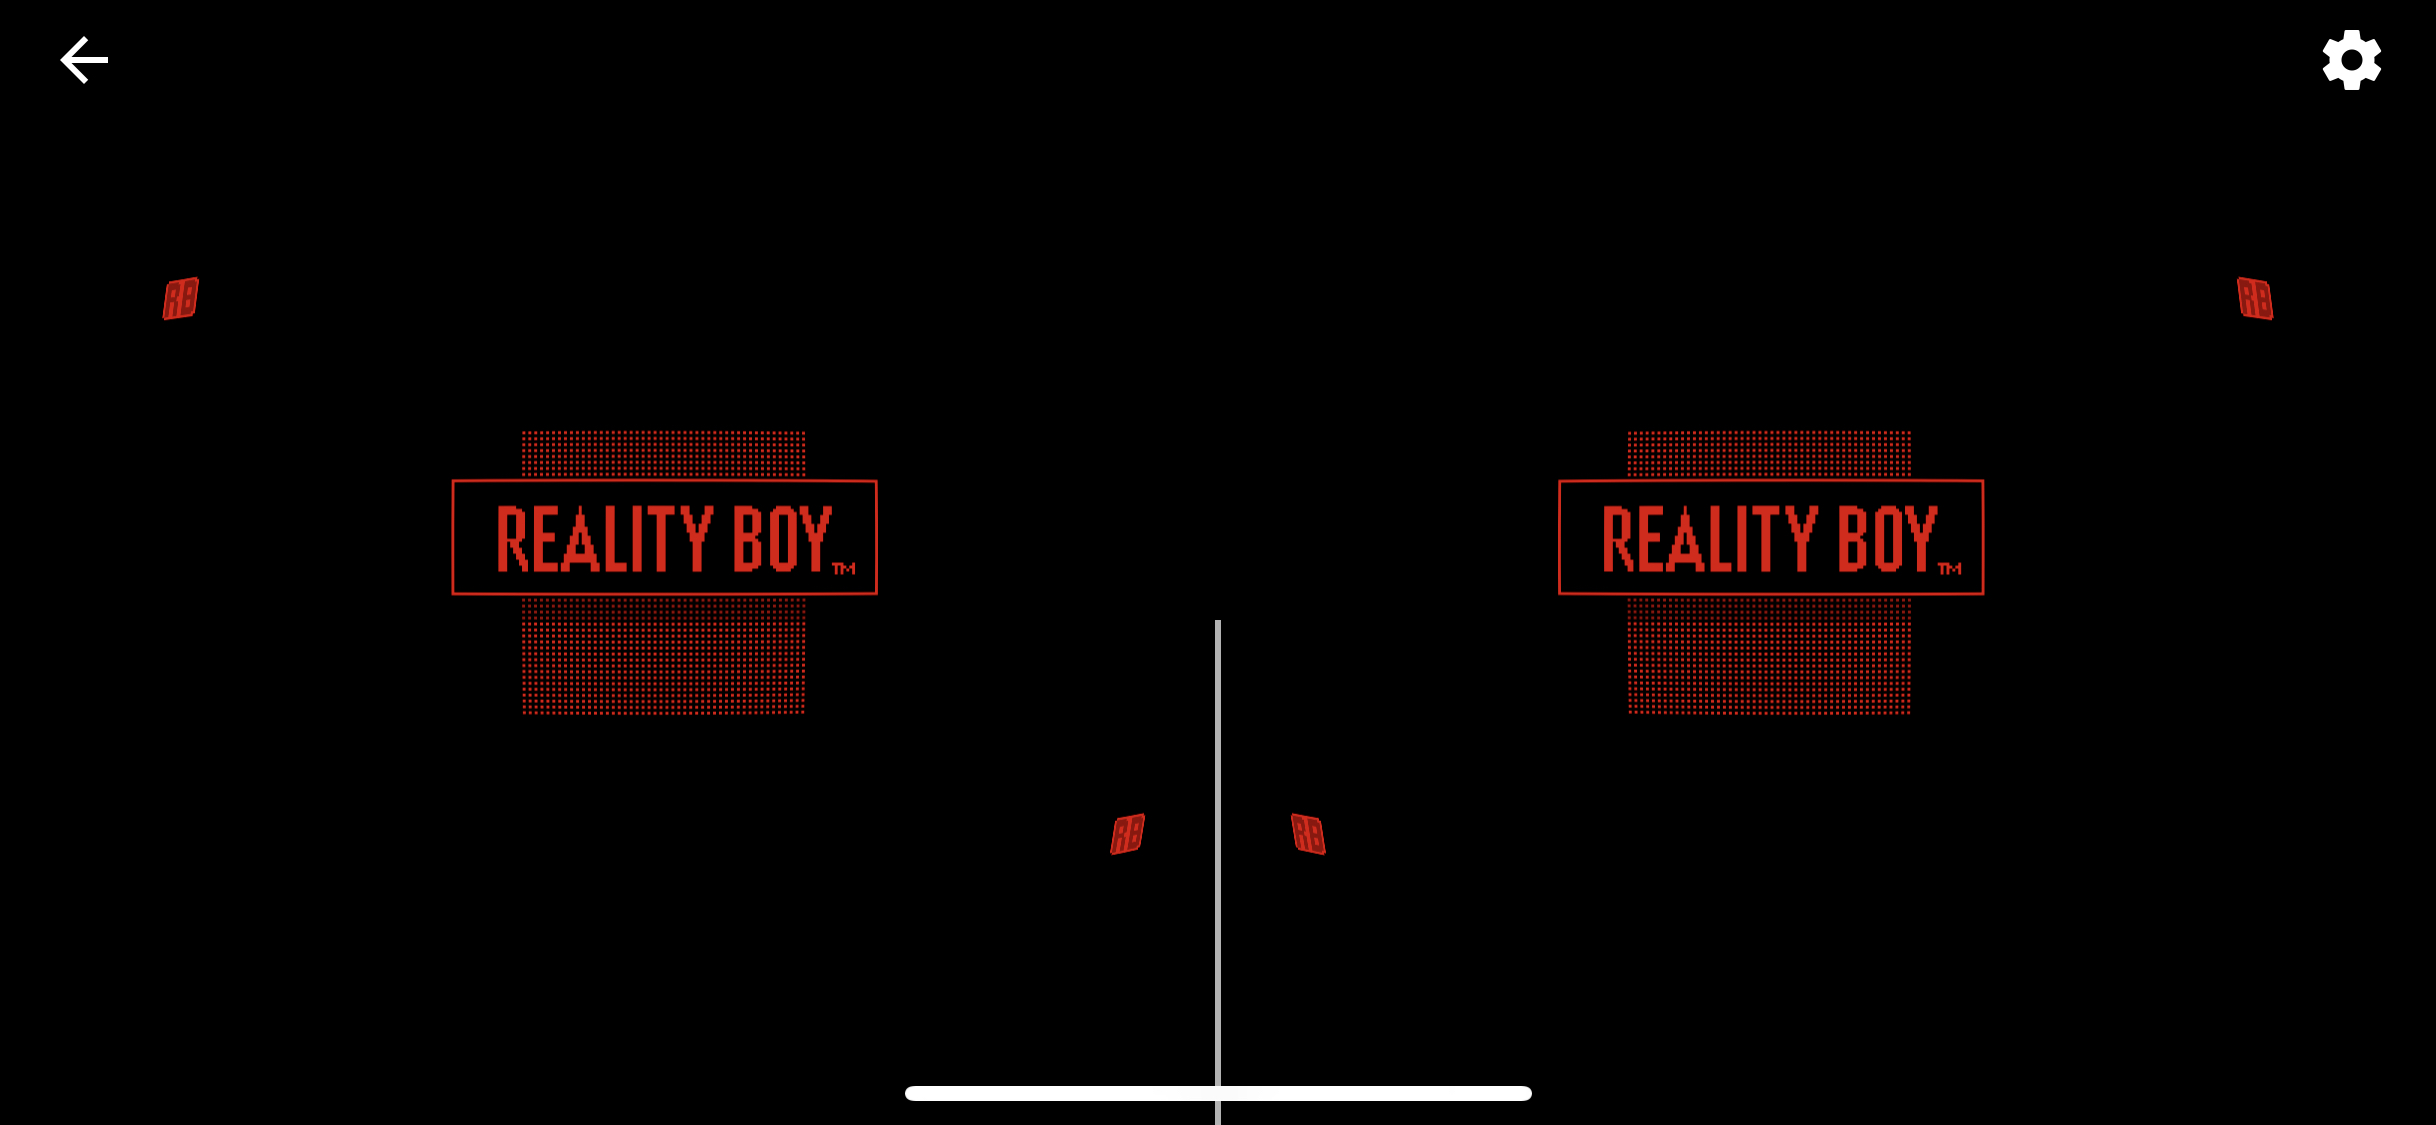
Getting back to the emulator, however, it wasn’t perfect – namely the extreme right of the left eye and the extreme left of the right eye seemed to be cut off. In the aggregate it looked OK but basically – when you see the logo with the four “VB” or “RB” logos in the corners, you’re supposed to be able to see all four. I could only see two. The ones in the middle I couldn’t see.
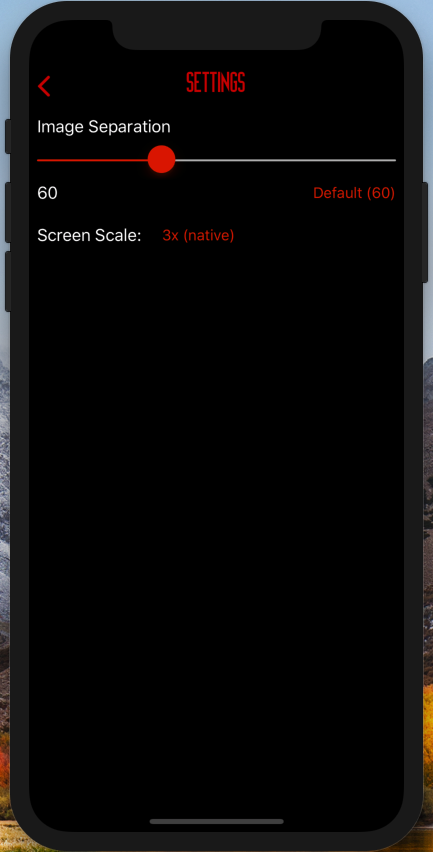
OK, so zero separation is wrong (though workable). But enough separation to see the images in the center is wrong, too. Long story short, I dialed in a separation of 60 (so, real pixels, and either 120 or 180 on the screen) and that seems to be a good compromise.
Now we’re cooking with gas… Nintendo gas!
The only issues left were the unknowns of supporting various devices. So, Google has this whole Cardboard concept, and each Cardboard viewer has a QR code on it with the Cardboard logo in the middle and by having the Cardboard SDK scan the QR code (and the code to do this comes with the SDK), the viewer in the app adapts to what the viewer is expecting. The problem with this is I’m left not knowing for certain if the separation I’ve chosen between the left and right screens works universally, and it’s beyond the scope of my project to go out and test a hundred viewers, so my compromise is to add a Settings screen to the app to configure the distance. The default is still 60 but you can dial it in differently if you’d like.
Another issue was the scaling of the screens themselves. By default it goes to the scale of the phone screen, so @2x for smaller Retina devices and @3x for larger devices, but I did a quick spot check in the iPhone SE emulator, the @2x size is too large for that screen, the images get cut off when running @2x but that’s the native scale of the device. I was going to blow it off but in the recent wake of the news that Apple is discontinuing the SE and not making an SE2 that we know of, the number of die hard SE users became apparent to me and so I made the screen scale be configurable in quarter-size increments (so, 1x, 1.25x, 1.5x, 1.75x, 2x, etc.) and it lets you know which scale is native for your device.
So all that was left was to make a slick icon and interface

I figured might as well make it look like it would in-game
 |
 |
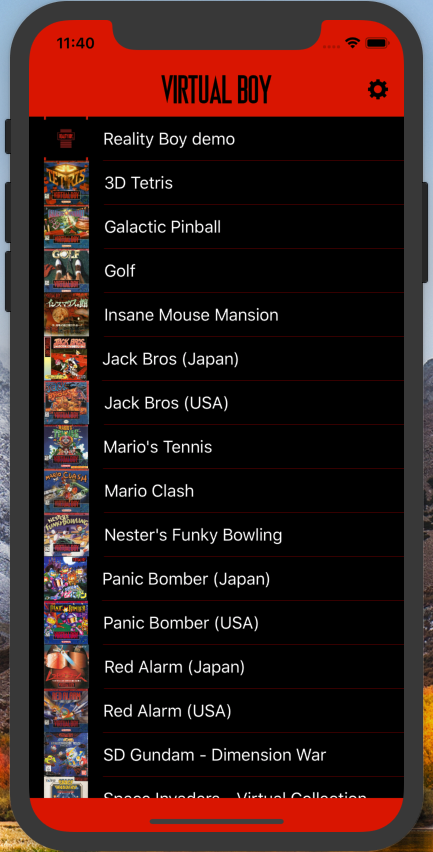
So, when I did the Wolfenstein 3-D and DOOM port updates, I was updating an existing product whose developer decided to surround the OpenGL game engine with CocoaTouch-powered menus. When I did the Quake and Quake III: Arena ports, I decided to do something similar – namely, postulate: if id Software had ported these themselves, this is what the CocoaTouch-powered menus and interface might look like. Well, I’ve done something similar to the game selection interface for this app – namely, if Nintendo had for some reason decided to release an app that was a compilation of all the Virtual Boy games, this is what it might look like. People begged them for years to make some sort of compilation for the 3DS like this, at least of the Nintendo games (they might have issues with third party games, and they’d definitely have issues with the Waterworld game) but they never did (though the mentioning of “we’ve done 3D before!” references to the Virtual Boy in the run-up to the 3DS was the first time they acknowledged the thing in years).
For the header and the “Settings” text, I used this font from someone on PlanetVB that pretty much recreates the Virtual Boy logo’s font. I have the ROM images and cover art images in their respective directories. I have the list of possible games as a hardcoded tuple array within the app itself. Really it should come from a plist or a JSON file or something but for now this works. It’s using the filenames from GoodVBoy (the Virtual Boy version of a series of utilities that renames ROM images based off of checksums) with cover art JPGs to match, mostly. I was going to include these in the Assets.xcassets file but when you source JPEG files from all over the Internet, you sometimes wind up with weird crap that chokes Xcode, but runs fine on the iPhone itself. I’d love to not only power it off of JSON but also make it into more of an informative museum, but for a 1.0 release this works.
It’s not perfect – namely there’s no way to change games from within the VR visor itself. You have to load up the game, then pop it into the visor, and if you want to try a different game you have to have to take the phone out of the visor. To make it be able to select things from within the visor I’d need to have it render some sort of native GL menu system and I’m not sure how long that would take.
Also up until now when I’ve done one of these ports I’ve maintained two GitHub repositories – one private and one public. The public ones just have the first finished code drop so that you don’t get to see my mistakes and flailing. This time I’m just doing the one, so if you’re curious what all crap I tried it’s there to see but really it’s not that interesting probably.
In any event, if you’re interested and you have the ROM images, check it out. If anyone wants to contact me I can be reached at tomkidd@gmail.com.